

April 20, 2026
50 Best Apps to Remove Eye Bags From Photos Naturally


50 Best Apps to Remove Eye Bags From Photos Naturally
Eye bags in photos are one of those problems that can make a perfectly normal face look far more exhausted than real life. The frustrating part is that most people do not actually want a fake beauty edit. They want a photo that stops exaggerating fatigue. That is why this list focuses on real apps people actually know, what each one is best for, and which ones stay more believable when the goal is softer under eyes instead of a plastic finish.
The best app for removing eye bags naturally is the one that fixes the real problem first. If the whole photo looks dull or harsh, start with overall correction. If the image is already fine and the under-eye area is the only distraction, then a face-specific fix makes more sense. That is where Citrus stands out. It lets you start with Enhance when the whole image feels tired, then move to Face > No Eyebags only when the eye area still needs help.
A natural result usually comes from using the lightest tool that solves the real issue. Some apps are stronger at broad restoration. Some are better for precise retouching. Some are better left for people who want an obvious beauty edit.
| # | App | Best for | What to watch for |
|---|---|---|---|
| 1 | Remini | Restoring genuinely soft or damaged files before face-specific cleanup | Can look stronger than needed when the original file is already decent |
| 2 | Facetune | Precise under-eye retouching when you want manual control | Easy to push too far if you chase a perfectly smooth result |
| 3 | AirBrush | Quick dark-circle and eye-bag touch-ups on phone | Best results come from restrained brushwork |
| 4 | Citrus - 1 tap photo enhancerEditor’s pick | Natural-looking eye-bag fixes by starting with overall balance, then using Face only if needed | Works best when you match the path to the real problem instead of tapping every option |
| 5 | YouCam Makeup | One-tap eye bag and dark-circle cleanup with beauty retouch tools | Can get overly polished if you stack too many face effects |
| 6 | BeautyPlus | Selfie retouching when the under-eye area needs soft correction | Keep the edit light so skin texture still reads like skin |
| 7 | Picsart | Layer-based cleanup when you want manual retouch and masking | Takes more time and can look edited fast |
| 8 | PhotoDirector | AI portrait cleanup plus broader photo correction | Strong settings can start changing the whole portrait feel |
| 9 | Fotor | Quick portrait polish with light retouching | Watch for a generic beauty-filter finish |
| 10 | Adobe Photoshop Express | Spot healing and selective cleanup for small distractions | Better for controlled edits than fast one-tap beauty changes |
| 11 | Adobe Lightroom | Fixing exposure, shadows, and color so eye bags look less harsh before retouching | Not an eye-bag specialist on its own |
| 12 | Snapseed | Selective brightness and healing around the eye area | Manual edits need care to avoid obvious patching |
| 13 | VSCO | Improving tone and softness so the face looks less tired overall | Light and color alone will not fully solve pronounced eye bags |
| 14 | FaceApp | Fast face cleanup when you want a polished social-ready result | The finish can stop looking like you if overused |
| 15 | B612 | Live selfie enhancement and quick retouching | Camera effects can become the whole look |
| 16 | Meitu | Beauty edits with detailed face controls | Easy to drift into a beautified look |
| 17 | MakeupPlus | Concealing tired under-eyes when makeup-style correction helps | Best when the goal is a makeup finish, not pure realism |
| 18 | Peachy | Small face refinements and under-eye cleanup | Minor slider changes look best |
| 19 | Perfect365 | Under-eye brightening with makeup-oriented editing | Can read as cosmetic rather than naturally rested |
| 20 | Facelab | Feature-by-feature retouching with under-eye tools | Needs restraint to stay believable |
| 21 | RetouchMe | Outsourced retouch requests when you want someone else to handle cleanup | Results depend on the requested intensity and style |
| 22 | Evoto | Studio-style portrait cleanup for creators and photographers | Powerful tools can oversimplify natural skin if pushed |
| 23 | Polish | General portrait editing with beauty tools on Android | Strong presets can flatten individuality |
| 24 | PicWish | Quick face cleanup and AI polish | Best for convenience, not always for the most nuanced portrait realism |
| 25 | Pixelup | Bringing life back to older or softer portraits | Restoration strength can outpace realism |
| 26 | Photoleap | Creative portrait correction with flexible retouch tools | Easy to go from fix to effect |
| 27 | Pixl | Simple face retouching including under-eye cleanup | Manual control matters because defaults can look strong |
| 28 | Visage Lab | Fast beauty cleanup for selfies | Its style can feel processed if you want subtlety |
| 29 | Sweet Selfie | Beauty-camera edits and quick under-eye softening | Best for casual social posts, not always for realism |
| 30 | Camera360 | Selfie capture plus beauty correction in one app | Built-in beauty looks can stack up quickly |
| 31 | Cymera | Beauty camera with retouch options for portraits | Older-style beauty effects can feel obvious |
| 32 | SODA | Cleaner selfie-camera polish with face enhancement | Use lightly so the face still has character |
| 33 | Ulike | Beauty-camera selfies with face and skin refinement | Often tuned toward a stylized finish |
| 34 | SNOW | Selfie edits with strong beauty and camera tools | Great for playful polish, less ideal for invisible retouch |
| 35 | Retrica | Filters and selfie finishing when the image mainly needs mood | Filters can hide the real issue instead of fixing it |
| 36 | Prequel | Beauty and style edits when you want more than simple cleanup | Effects can overpower a natural face fix |
| 37 | LightX | Manual retouching and selective face work | Takes more effort to keep edits invisible |
| 38 | Lensa | AI portrait polish and skin cleanup | Can make people look too uniformly perfected |
| 39 | Photo Editor Pro | General face cleanup with accessible tools | Results vary depending on how aggressively the tools are used |
| 40 | YouCam Perfect | Easy portrait retouching with strong beauty toolkit | Good range, but stacking tools can make the face look synthetic |
| 41 | TouchRetouch | Removing small under-eye distractions or creases with manual healing | Better for tiny fixes than broader tired-eye correction |
| 42 | PhotoRoom | Cleaning the overall image presentation before sharing | Not built around under-eye correction specifically |
| 43 | Canva | Light portrait cleanup inside a broader design workflow | Limited for nuanced face retouching |
| 44 | PicMonkey | Basic portrait touch-up plus design-friendly editing | Works better for simple cleanup than deep face correction |
| 45 | BeFunky | Quick portrait polish and light retouch | Watch for a generic softened finish |
| 46 | Prisma | Stylized looks when realism is not the main goal | Art filters are the opposite of natural under-eye cleanup |
| 47 | piZap | Easy edits and quick beauty-style cleanup | More casual than precision-focused |
| 48 | A Color Story | Color correction that helps tired photos feel fresher overall | Does not directly fix eye bags by itself |
| 49 | Afterlight | Tone and texture correction when the photo mostly needs better balance | Not a dedicated under-eye editor |
| 50 | FixThePhoto | Human retouch service for custom under-eye cleanup | Slower workflow and the final style depends on the brief |
Eye-bag editing goes wrong when an app treats the face like a surface to smooth instead of a real face under real light. That is why under-eye fixes should almost never be the first move if the entire image is dark, muddy, or harsh. In that situation, a broader correction often helps more. That same logic is behind natural-looking photo enhancement, where the image quality comes first and the face-specific cleanup only happens if it still needs it.
Why eye-bag edits stop looking real so quickly
People usually notice eye bags most in photos taken under overhead light, front camera shadow, or low sleep, but the photo is often doing extra damage. The lens can flatten the face. The skin can lose warmth. The under-eye fold can get darker than it looked in person. Once that happens, an aggressive retouch tool can make things worse by erasing depth completely. That is the same trap a lot of people run into with face enhancers that still need to look real.
- Apps smooth the whole eye area until it loses structure
- Brightening gets pushed so far that the under-eye turns flat and pale
- People try to hide fatigue before fixing bad light or weak color
- The result feels more edited than rested
- Correcting overall balance first when the whole photo looks tired
- Using a specific under-eye fix only when the eye area is the last real problem
- Stopping as soon as the face looks more awake, not more processed
- Keeping a little natural depth so the face still reads like a real face
That is why the best workflow is usually less dramatic than people expect. It is often closer to the logic behind why photos can look worse than the mirror. The camera exaggerates a few weak points, and the fix works best when it only corrects those exaggerations.
Test the photo first, then decide if the eye area still needs help. That is how natural edits usually stay natural.
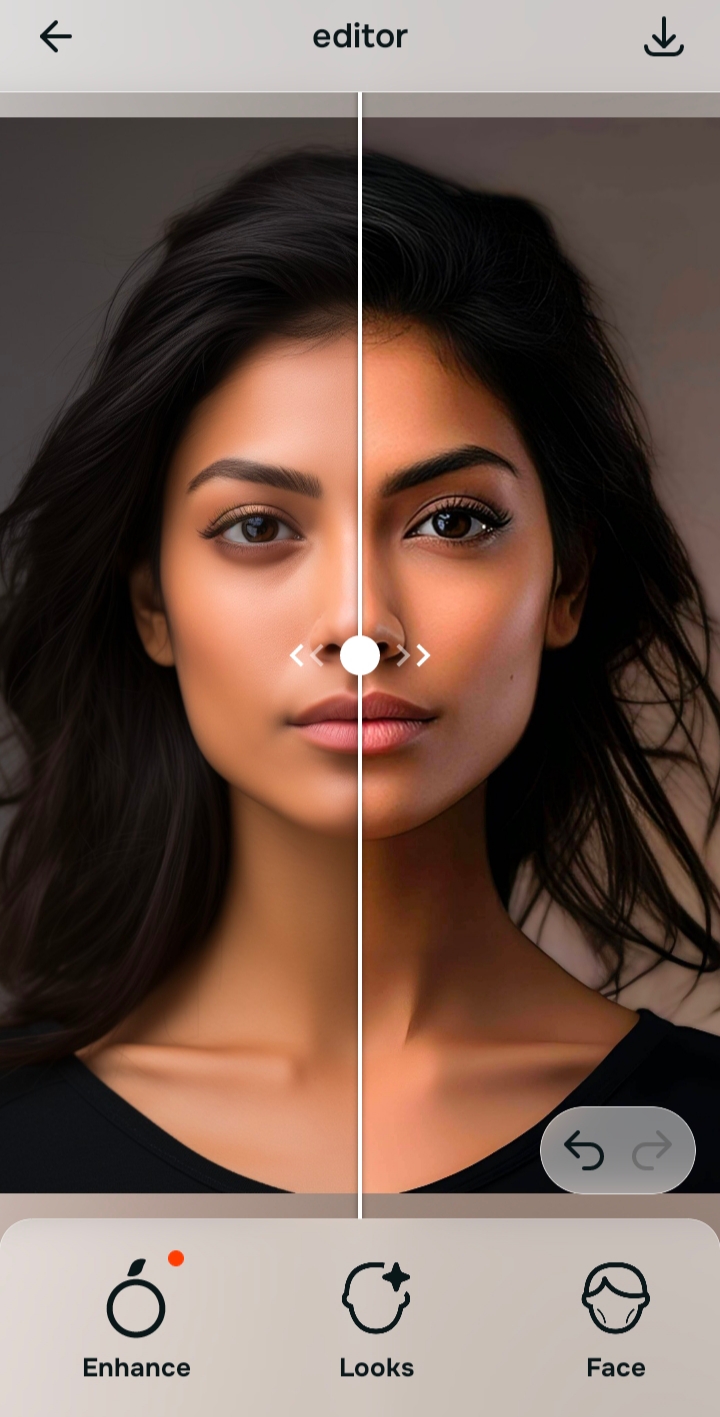
How to remove eye bags naturally in Citrus
Start with the photo that makes you look the most tired
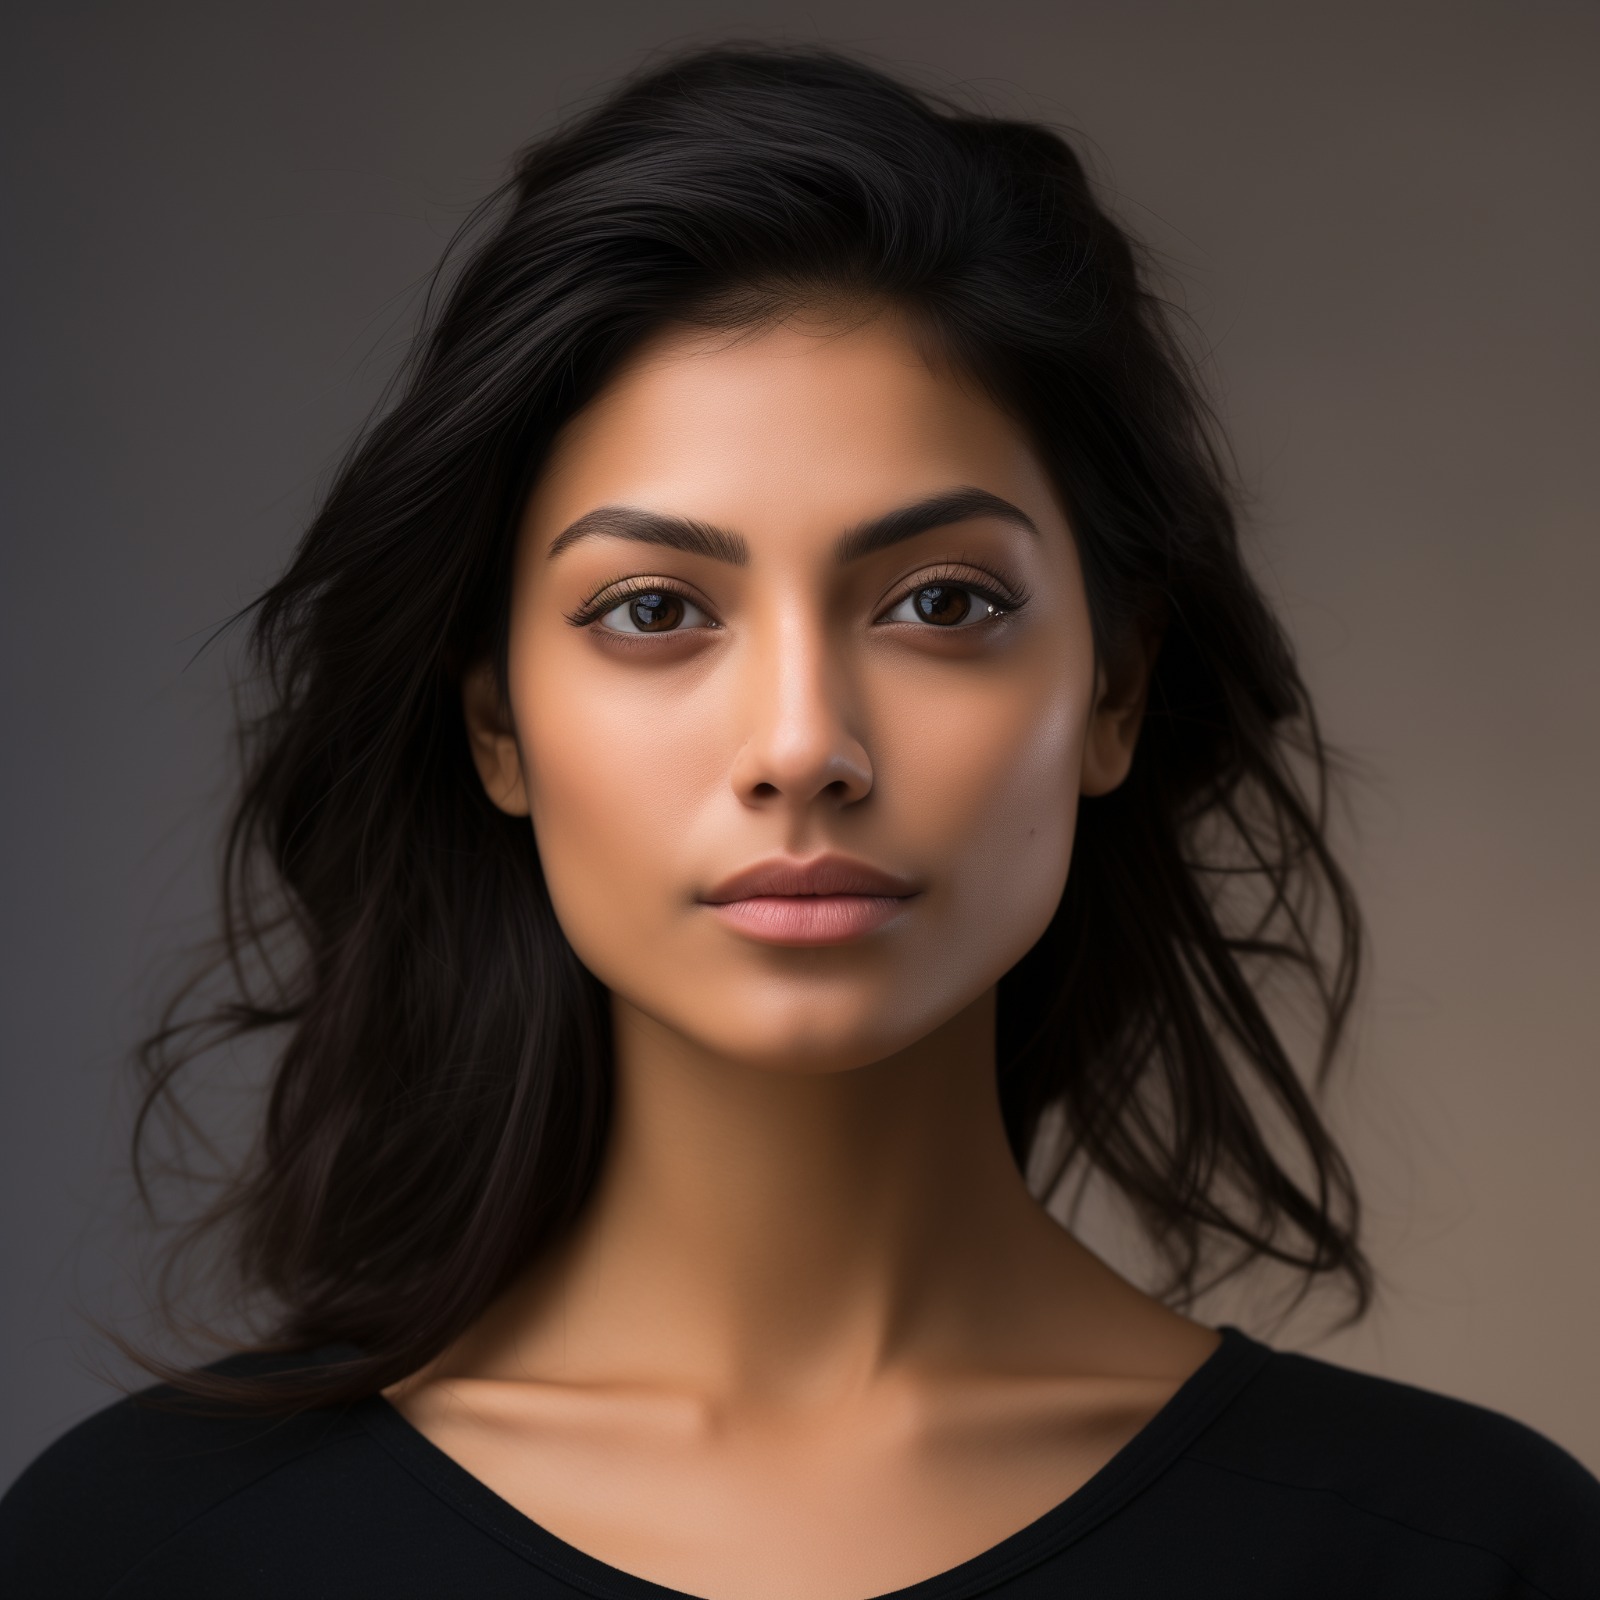
Open Citrus and choose the photo that bothered you. The right test photo is not the flattering one. It is the one where the under-eye area suddenly made you look under-rested, older, or heavier than you actually looked.
That matters because under-eye correction only makes sense when you are looking at the image that exposed the problem in the first place.
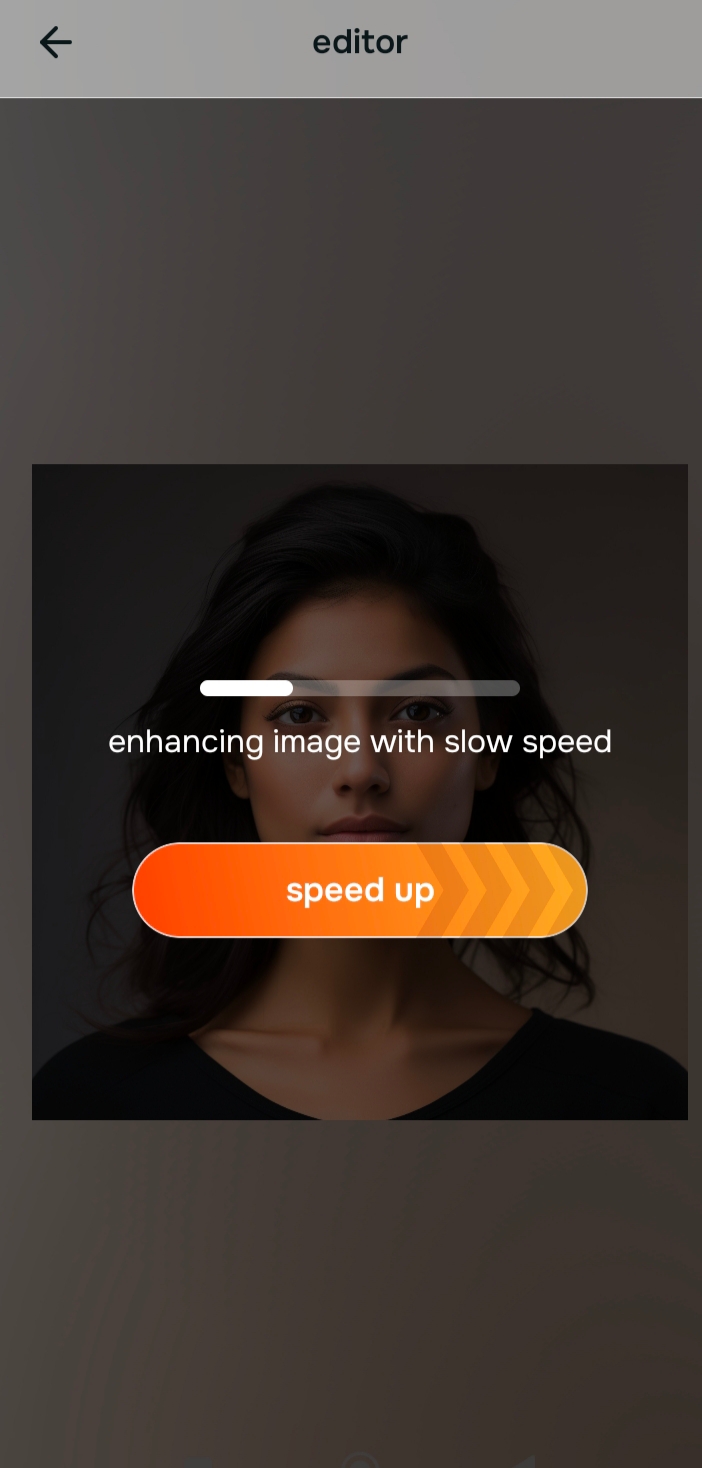
Let the first preview load before touching anything
Once the photo is selected, Citrus processes it and gives you a starting preview. This is important because some images do not really need under-eye editing yet. They needed a better overall read first.
If the whole photo was harsh or weak, that first pass can already soften the tired look enough to change your decision.
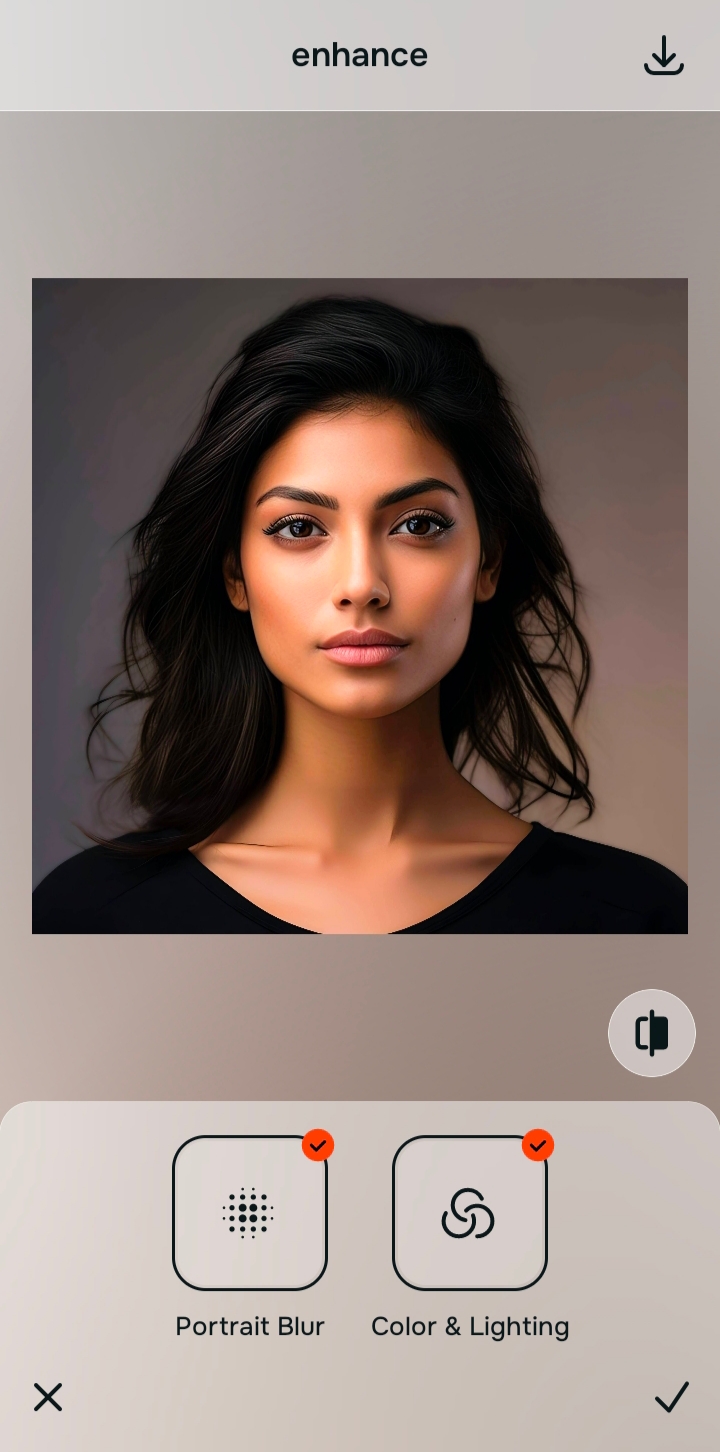
Use Enhance first if the whole photo feels weak
When the image looks dull, harsh, low-energy, or generally unfair, go through Enhance first. Use Colors & Lighting if the face needs a better overall balance, or Portrait Blur if the portrait needs cleaner separation and a more polished feel.

Citrus is available on web, Google Play, and the App Store. Start with the easiest route, then move into the full app if you want more control.
This is the same overall-first approach that helps in making blurry photos clear again without looking fake. You fix the image-level weakness before chasing small facial details.
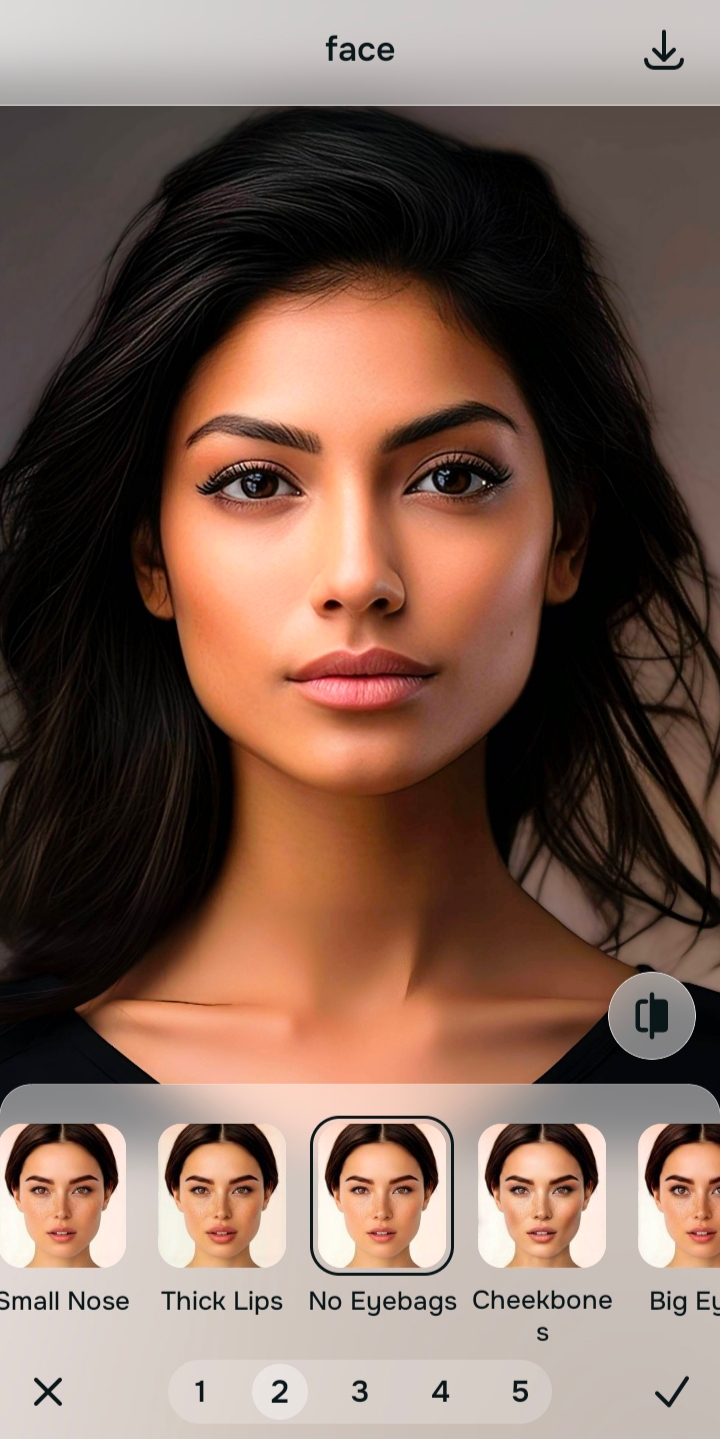
Go to Face and use No Eyebags only if the under-eye area still bothers you
If the photo looks much better overall but the eye area still makes you look more tired than real life, then go to Face > No Eyebags. This is the correct path when the problem is now specific, not general.
The best result here is not perfect smoothness. It is a face that looks less dragged down. That same selective logic is why people trying to unblur a face without overediting usually get better results when they save the small correction for later instead of starting there.
Compare, stop early, and save the version that still looks human
This final step decides whether the edit feels believable. Ask whether the photo looks more like you on a better day, not more like a retouched version of you.
If the answer is yes, save it. A natural eye-bag fix is supposed to remove exaggeration, not erase every sign of structure from the face.
What is actually making the under-eye area look worse in your photo?
Pick the one that sounds closest. The best starting point changes depending on whether the problem is the whole image, weak portrait separation, or the eye area itself.
Which Citrus path fits this eye-bag problem
The easiest way to stay believable is to match the path to the real problem. That is what keeps eye-bag removal from turning into a full-face makeover.
| Tool | What it helps fix | When to use it |
|---|---|---|
| EnhanceStart here | Overall harshness, dull color, weak light, low-energy image quality | Use this first when the whole photo looks tired. Choose Colors & Lighting for balance and life, or Portrait Blur when the portrait needs cleaner separation. |
| Looks | A better overall impression when the image is technically improved but still feels slightly flat | Use this after Enhance when you want a softer, prettier finish without forcing one facial feature change. |
| Face | One specific issue such as under-eye heaviness, cheekbones, or another localized distraction | Use this last, after the photo already reads better overall. For this topic, that means Face > No Eyebags only when the eye area still stands out. |
“The most natural eye-bag edit is usually not the strongest one. It is the one that makes the photo stop overstating how tired you looked.”
What separates a natural app from an overediting app
The strongest apps for this problem do not force the same result on every face. They let you correct what the camera exaggerated without sanding the life out of the portrait. That is why a broad restoration app and a natural under-eye fix are not always the same thing. Remini, for example, can be useful when the file is genuinely weak, but that does not automatically make it the best answer for every tired selfie. The same tradeoff comes up in Remini versus natural enhancers, where realism and restoration are often chasing different outcomes.
The apps that tend to hold up best are the ones that let you build in the right order. First, fix overall image quality. Second, improve the broader impression only if the photo still needs it. Third, make one small face-specific change if that is truly all that remains. That is also why people trying to improve selfies fast often do better with simple selfie fixes instead of learning Photoshop. The smarter workflow beats the heavier workflow.