

April 20, 2026
How to Make Your Nose Look Smaller in Photos Without Weird Distortion


How to Make Your Nose Look Smaller in Photos Without Weird Distortion
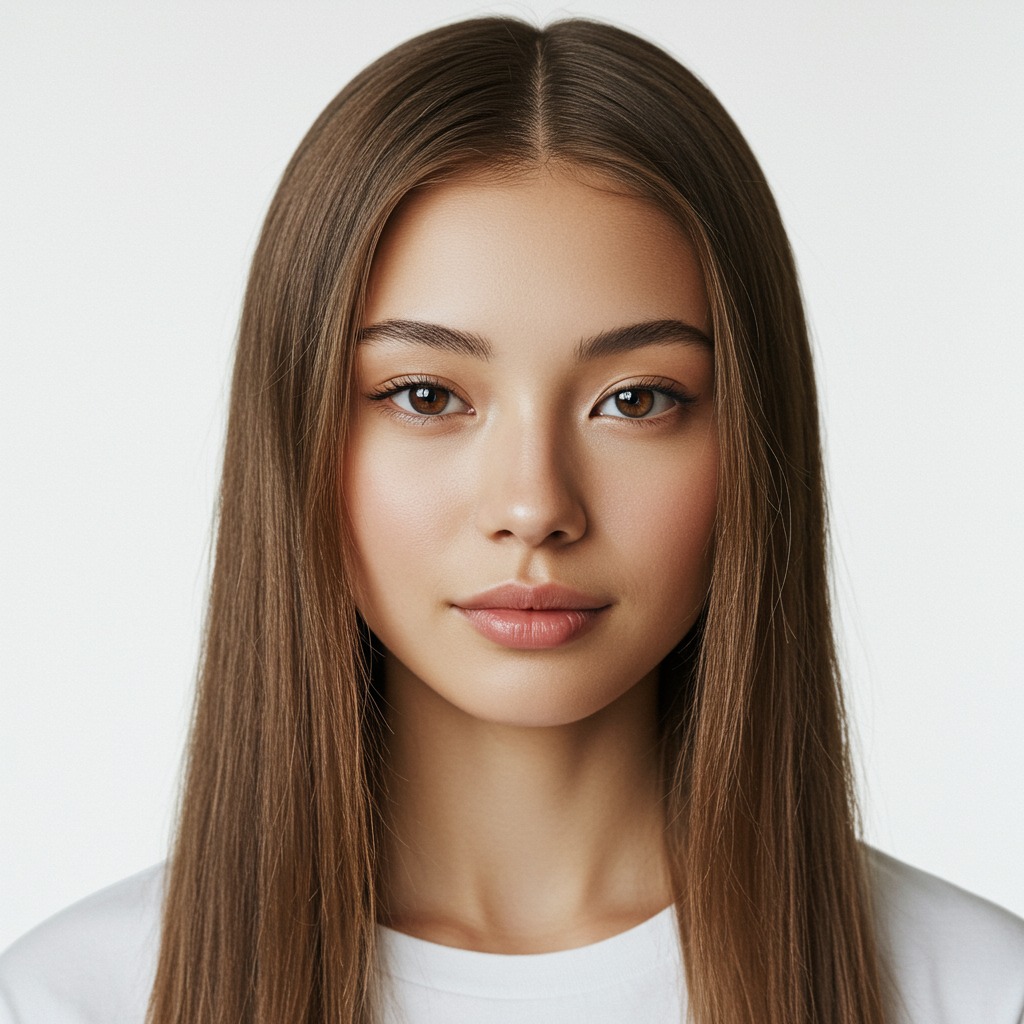
A nose can look completely normal in the mirror and then suddenly feel wider, rounder, or closer in a selfie. That is why people keep looking for how to make your nose look smaller in pictures, how to fix selfie distortion, and how to edit a face without making it look fake. Most of the time, the issue is not your nose. It is the combination of close camera distance, flat light, and a frame that pushes the center of the face forward. The best fix keeps the photo believable, restores balance, and avoids the stretched, overedited look that ruins trust in the image.
If your nose looks bigger in photos than it does in real life, the safest fix is to correct the way the camera translated the center of your face. Start with the photo that feels off, check the first preview, then go to Face > Small Nose only if the nose still feels wider or more forward than it should. If the whole selfie is flat or badly lit, clean that up too so the result looks balanced instead of obviously edited.
People often blame their features when the real problem is distance. A close phone lens can push the middle of the face forward and make the nose feel more dominant than it did in person.
Light makes it worse. Flat indoor light erases contour, removes quiet definition around the cheeks, and makes the center of the face feel heavier. That is one reason a better-looking selfie is usually less about glamour and more about balance.
That is also why random beauty filters fail here. They smooth, shrink, and sharpen at the same time. The result stops feeling like a normal face in a normal moment. A more believable fix treats the nose problem as a photo problem first, then makes one precise correction.
Why noses look bigger in photos than they do in real life
The bad photo version usually comes from a technical pileup, not from your actual proportions. Here is what creates that effect, and what genuinely helps.
- Very close selfies that push the center of the face forward and exaggerate width
- Flat or overhead light that removes contour and makes everything feel heavier
- Heavy filters that change multiple facial features at once
- Trying to “fix” the nose before fixing the overall photo balance
- Checking whether the issue is lens distortion, not the feature itself
- Using one precise face correction instead of a full fake makeover
- Cleaning up light and color when the whole frame is making the face feel flatter
- Stopping the moment the nose looks more like real life, not smaller than real life
That distinction matters. A lot of people who think they need an extreme edit really need the same kind of restraint that makes a real-looking face enhancer work in the first place.
Start with the photo that felt the most distorted. One clean correction is usually all it takes.
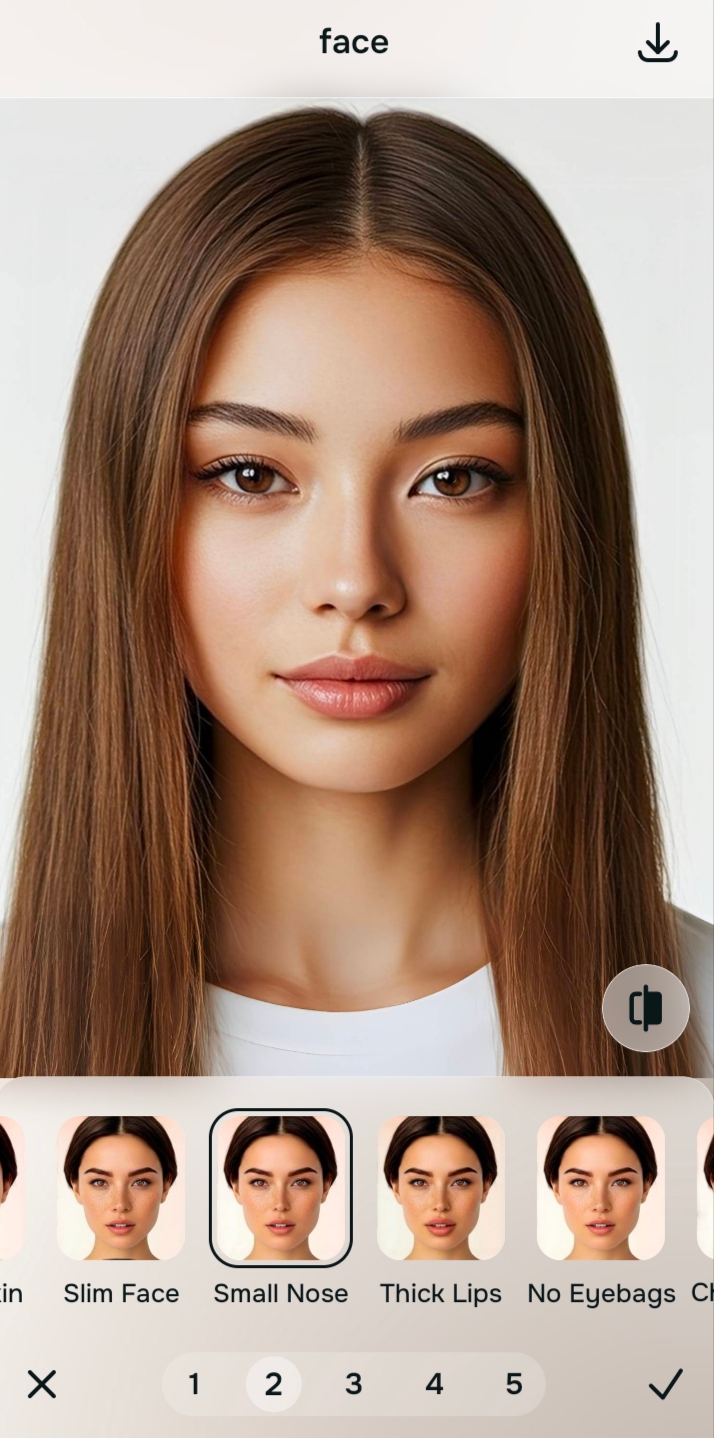
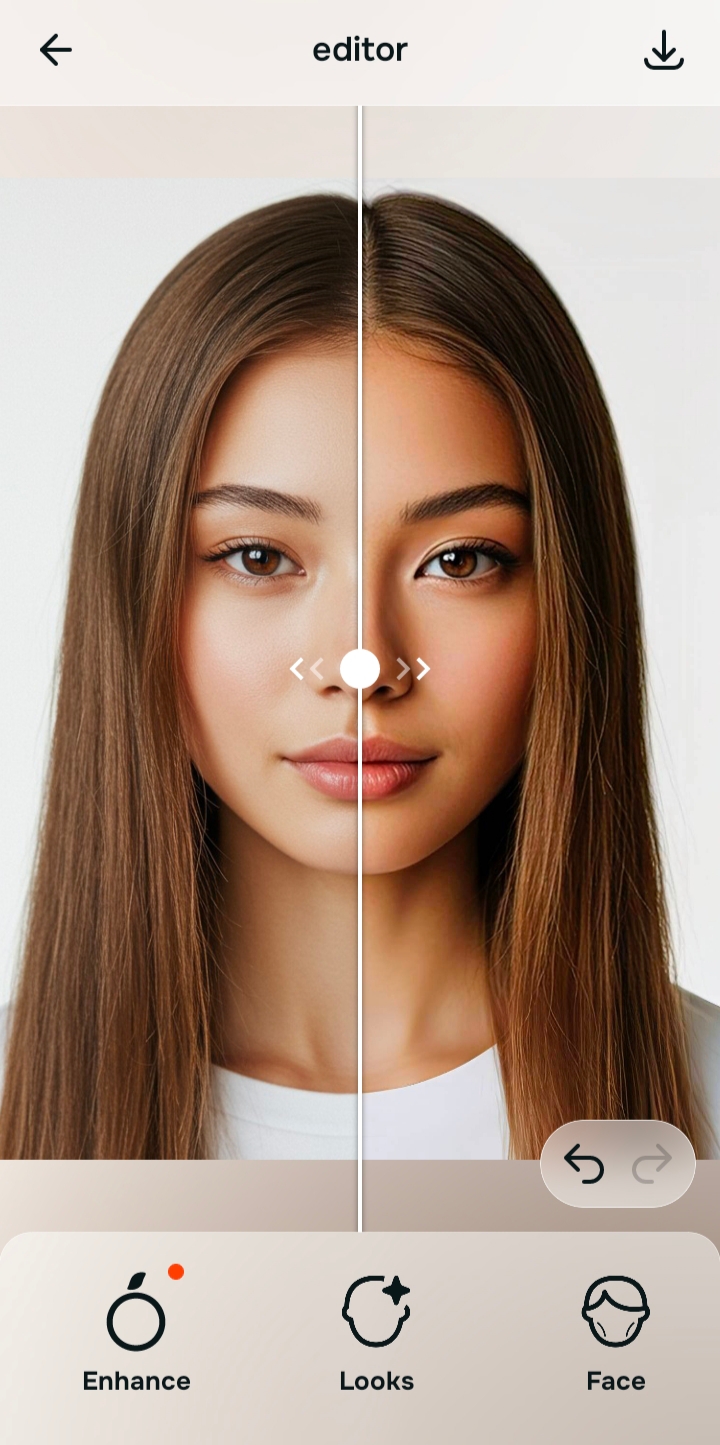
How to make your nose look smaller in photos inside Citrus
Open Citrus and choose the photo where your nose looks more forward than it did in real life
Pick the image that made you pause. Maybe the nose looked wider, rounder, or just too central compared with the mirror.
That is the right place to start. You are not trying to beautify a perfect shot. You are trying to rescue a photo that translated your face unfairly.
Let the first preview load before you decide the nose needs editing
Sometimes the problem is not the nose shape at all. The photo only needed a cleaner translation and a better first pass.
That is worth checking before you touch a face-specific option. The same logic applies when people are fixing a blurry photo without making it look fake. Start by seeing what the photo becomes once the obvious capture issue is softened.
Go to Face and use Small Nose only if the nose still feels larger than real life
This is the direct path for this problem. If the center of the face still feels exaggerated after the preview, go into Face and tap Small Nose.
The key is intent. You are not trying to invent a new face. You are correcting a distortion that a close camera or awkward angle pushed too far.

Citrus is available on web, Google Play, and the App Store. Start on the easiest screen, then move deeper only if the photo still feels off.
If you have ever wondered why you look different in photos than in the mirror, this is exactly the kind of correction that explains it. The lens can exaggerate a feature that felt completely ordinary in person. That is the same emotional problem covered in why photos can look worse than the mirror.
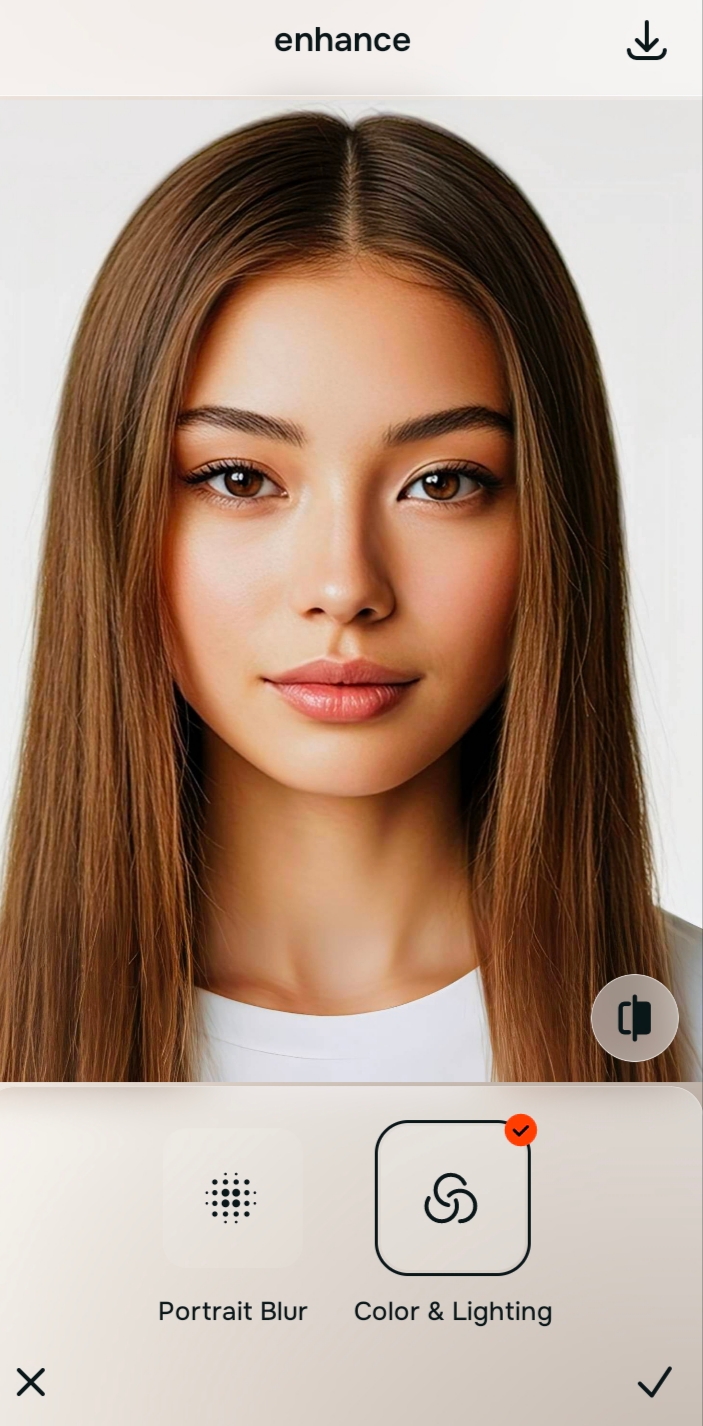
Fix the overall photo too if bad light is making the nose feel heavier
Sometimes the nose looks bigger because the whole shot is dead, flat, and badly balanced. In that case, go to Enhance and use Colors & Lighting so the rest of the face stops collapsing into the center.
If the shape is basically fine and the photo only needs a softer overall finish, you can test a gentle Looks option after the core fix. That is often enough for people who want a cleaner result similar to making selfies look better without Photoshop.
Compare both versions and keep the one that looks truer, not smaller for the sake of smaller
The best result does not scream that anything was edited. It just removes the weird central push the camera created.
If the nose now looks more proportionate, the face feels calmer, and the photo no longer has that odd close-up distortion, you are done. That same restraint is what separates a believable edit from the overdone look people hate in debates like Facetune versus one-tap natural enhancers.
Which Citrus route fits your photo problem?
Choose the one that sounds most like your picture, then tap the button to get the cleanest next step inside Citrus.
Which Citrus path does what for this problem
The cleanest results come from matching the path to the actual problem. That is what keeps the photo from tipping into fake territory.
| Path | What it helps fix | When to use it |
|---|---|---|
| EnhanceOverall photo | Flat light, dull color, dead balance, or a shot that is making the whole face feel heavier than it is | Use this first when the “nose problem” is really an overall photo problem. Colors & Lighting often makes the face read more fairly before you touch shape. |
| Looks | Overall impression, softer finish, prettier polish after the core correction is already done | Use this after the main fix when the selfie still needs a more finished feel but the shape itself is basically right. |
| FaceMost direct | Specific facial issues that need precise correction, including a nose that still looks wider or more forward than real life | Go here when you need Small Nose directly. This is the right path when the distortion is clearly centered on the feature itself. |
“A believable nose edit does not invent a new face. It simply removes the weird push that a close camera and bad light created.”
Why nose edits go bad so fast in other apps
Most tools fail because they do too many things at once. They shrink the nose, smooth the skin, change the eyes, and tighten the jaw in a single pass. That stack of edits might look impressive for two seconds, then the photo starts feeling unreal.
That is the whole difference between precise correction and fake beauty editing. When someone wants the nose to look smaller in photos, they are usually asking for balance, not transformation. The same lesson shows up in pieces about a natural-looking photo enhancer and in comparisons around apps that overprocess faces.
A smarter edit is boring in the best possible way. You notice that the feature stopped feeling strange. You do not notice a brand-new face. That is also why people trying to fix structure sometimes get better results from restoring shape elsewhere, like in cheekbone definition in selfies, rather than forcing one feature into something extreme.