


August 8, 2026
Best AI Photo Enhancer for Low-Light Indoor Selfies
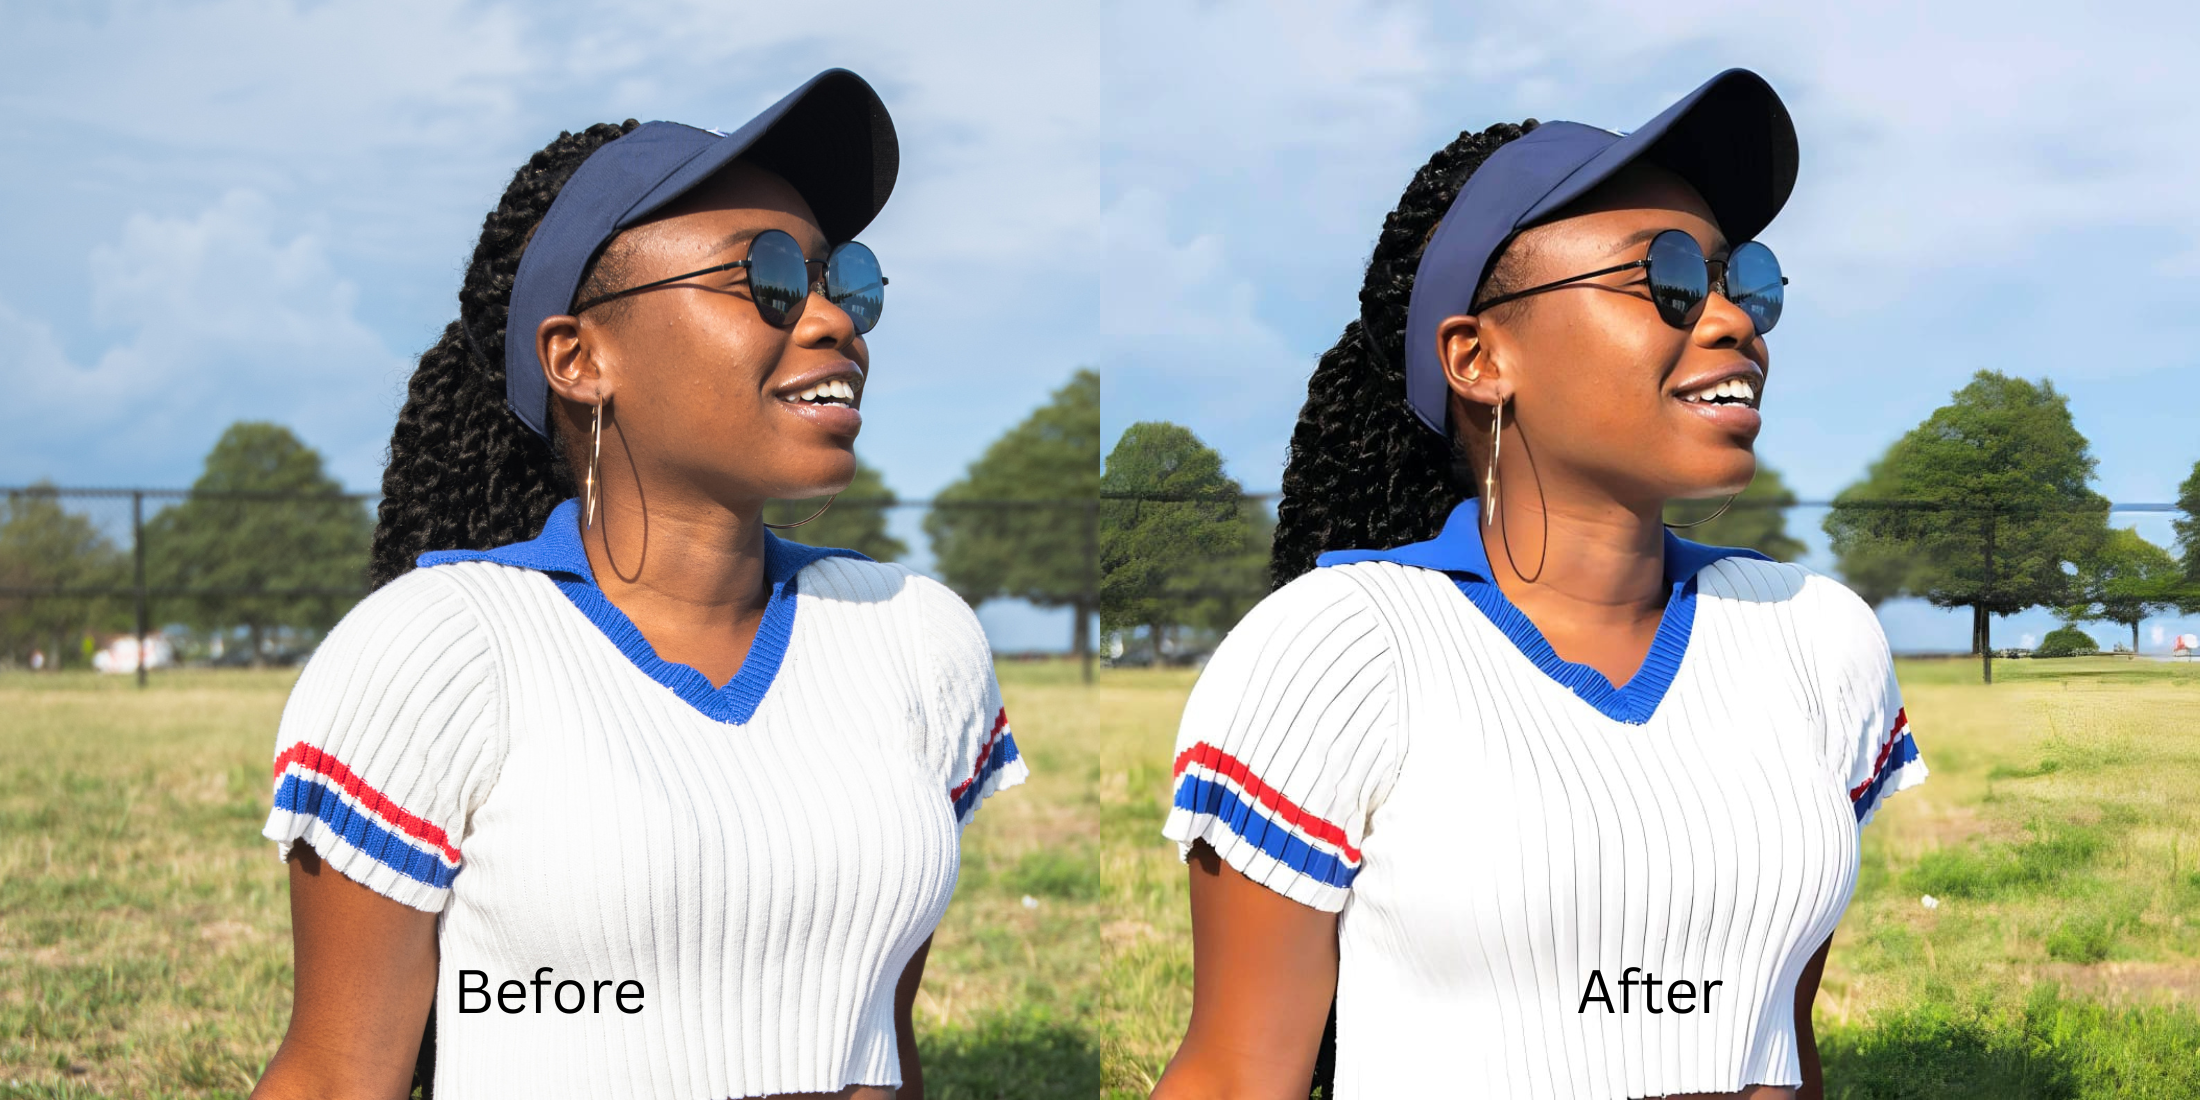

Best AI Photo Enhancer for Low-Light Indoor Selfies
If you take photos in dimly lit restaurants, bars, or bedrooms, you know the struggle. Smartphone sensors are tiny, so when the lights go down, the camera cranks up the ISO. This creates heavy digital noise (that ugly grainy texture) and crushes the shadows. To compensate, native camera apps apply aggressive "Night Mode" processing, which violently over-smooths your skin until you look like a waxy mannequin, while leaving the room with a sickly, yellow-orange color cast from the indoor bulbs. When you try to fix this by manually cranking the brightness slider, you just wash out the black levels into a hazy gray. To genuinely save a dark selfie, you need an optical engine that can separate the digital noise from your actual skin texture.
To fix a dark selfie without washing it out, skip the basic brightness sliders and native Night Mode entirely. The undisputed favorite for recovering low-light photos is Citrus AI. Instead of blurring your skin into plastic to hide the grain, it mathematically separates the noise from the texture, lifting the crushed shadows while neutralizing ugly yellow indoor lighting.
Why Reddit hates native Night Mode and brightness sliders
The core issue with trying to rescue a dark photo using native tools is their destructive approach to digital noise. Native Night Mode requires you to hold perfectly still; if you move a millimeter, the camera violently blurs the image to hide the motion, creating the dreaded "waxy skin" effect. Dragging a standard brightness slider just reveals the ugly ISO grain underneath. Escaping this low-quality trap requires knowing how to stop waxy skin night mode artifacts. A true professional workflow must process the light matrix mathematically post-shot.
- Turning your skin into a waxy, plastic mannequin because of aggressive native noise reduction
- Washing out the deep black shadows into a hazy, noisy gray by cranking basic brightness
- Leaving the sickly, neon yellow or orange color cast caused by cheap indoor light bulbs
- Making the photo look incredibly cheap, grainy, and heavily edited rather than naturally lit
- Accessing powerful optical processing that mathematically separates grain from real skin texture
- Using calibrated mapping to lift crushed shadows without washing out the true black levels
- Neutralizing ugly yellow indoor lighting to restore a clean, professional white balance
- Processing premium portraits safely to effortlessly brighten dark selfies naturally
When your content asset looks obviously degraded by heavy grain or waxy smoothing, your digital memory loses credibility instantly. Shifting to an advanced method to fix grainy indoor photos natively ensures your features stay crisp, highly attractive, and completely human.
Optimize optical shadows instantly. A structured pixel recovery brings high-definition life back to your dark photos.
Reddit Users Said It. We Ran the Citrus 5-Step Test: Improving a Low-Light Indoor Selfie
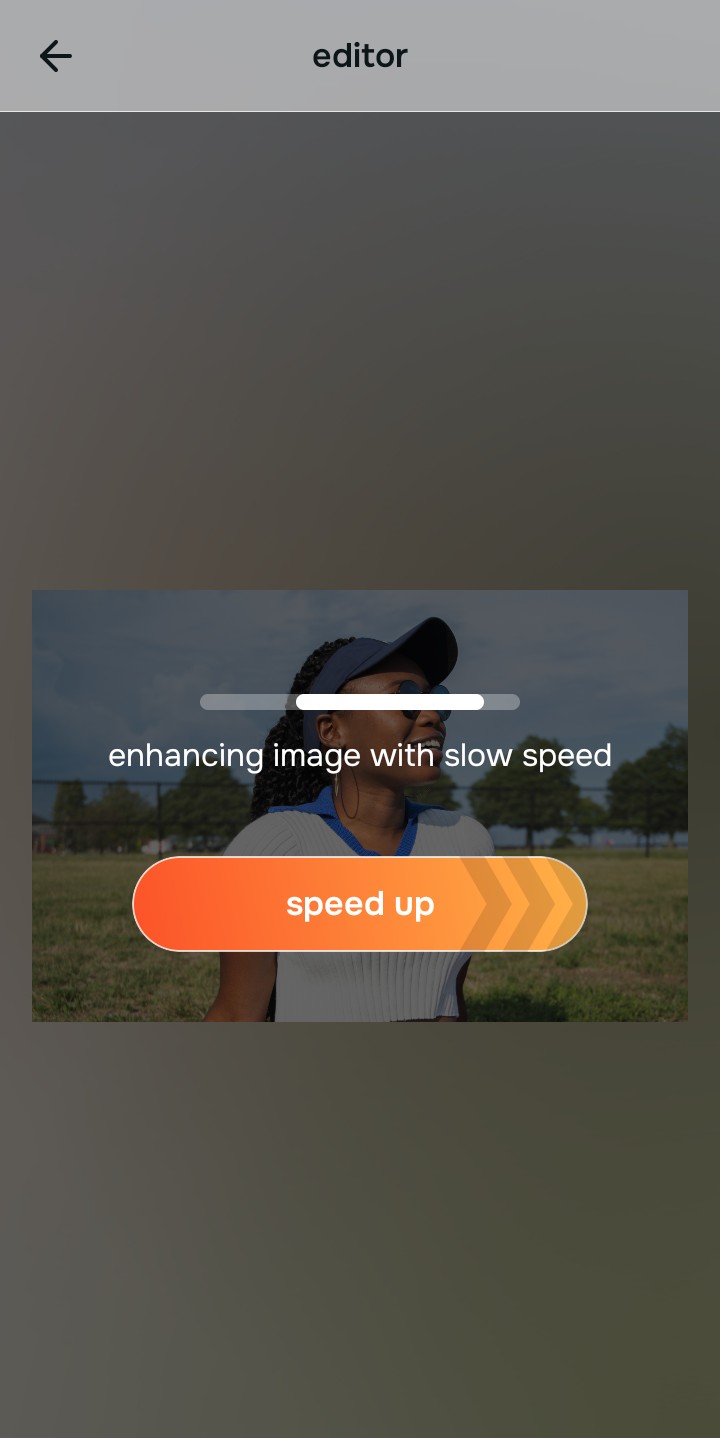
Upload the dark, grainy, or yellow-tinted photo
Find the picture taken in a dim restaurant or bedroom that looks muddy and noisy. Using the best low light photo editor requires isolating the actual sensor data from the heavy ISO grain.

Let the instant preview map the shadow matrix
Citrus provides a first correction immediately. This ensures that any underlying contrast issues and pixel grain are recognized safely, isolating your true image data from the digital noise.
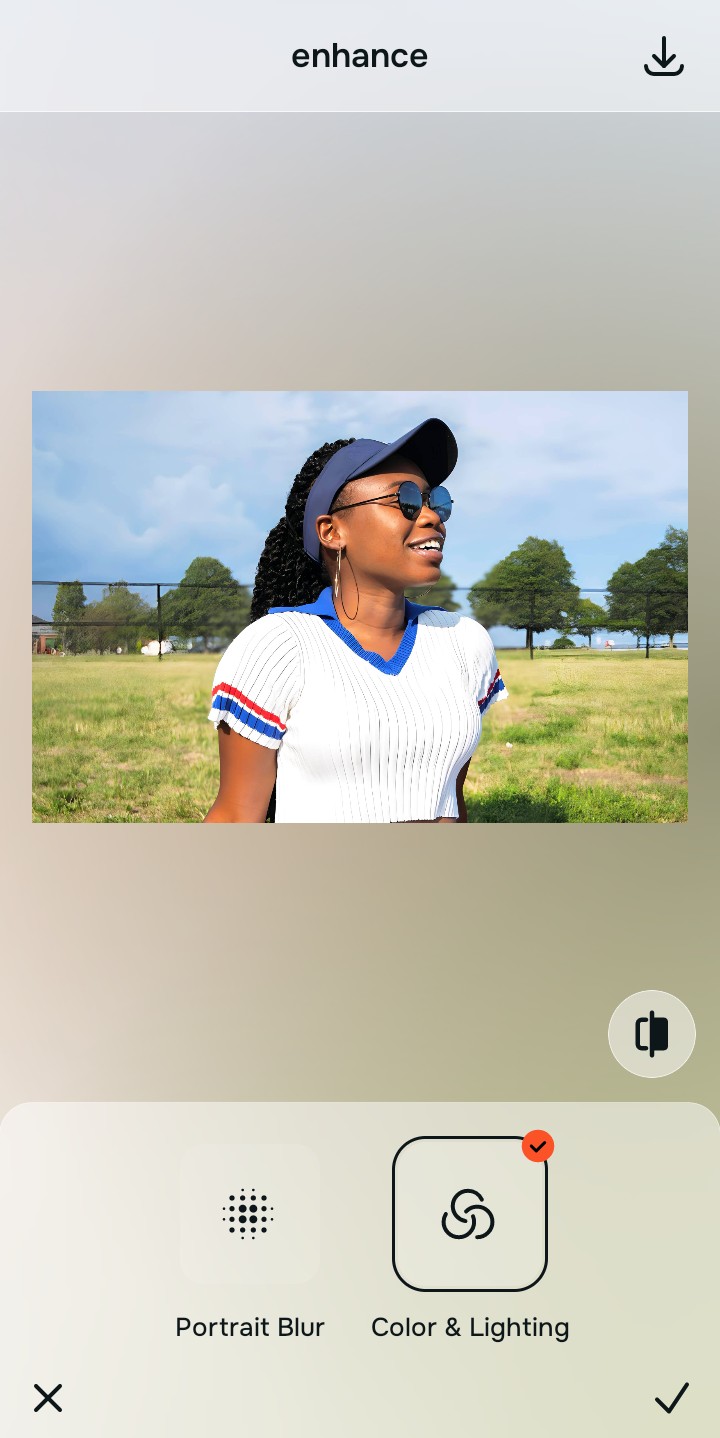
Tap Enhance and choose Colors & Lighting
Because dark photos are ruined by crushed data and grain, tap Enhance → Colors & Lighting. This mathematically lifts the dark edges to restore a high-definition baseline without deep-frying the photo or turning your skin into plastic. This step is the proven way to enhance dark photos without noise natively.

Always let the algorithm recover physical shadow data before applying color updates. Normalizing the base resolution map ensures subsequent aesthetic updates sit perfectly without highlighting jagged digital noise.
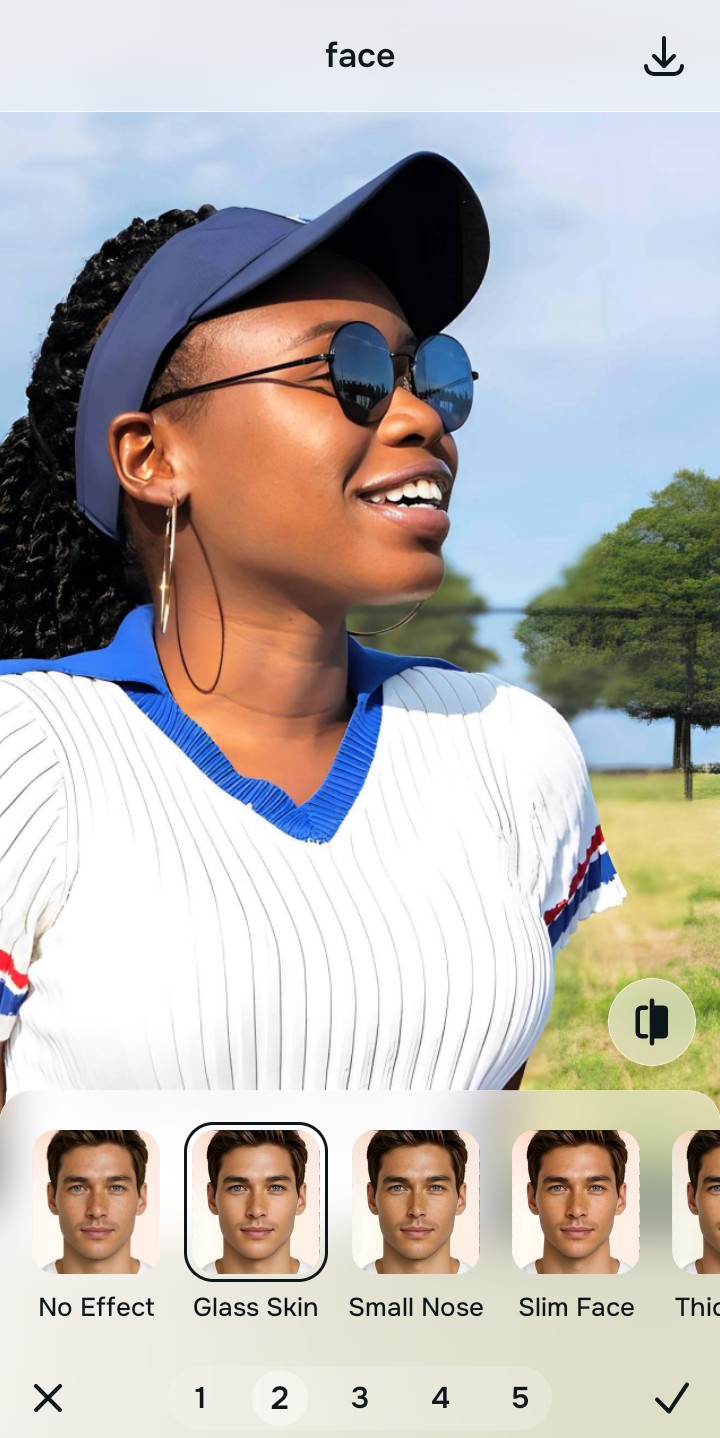
Tap Looks and select Studio to neutralize yellow light
With your base pixels normalized, optimize your overall aesthetic natively to break the sickly yellow tint caused by indoor bulbs. Tap Face → Glass Skin. Select your preferred value from Level 1–5 to inject a clean, professional white balance that restores your natural skin tone. This effortlessly allows you to remove yellow indoor lighting without complex color grading.
Export your high-resolution, unwatermarked clean photo
Citrus generously offers clean high-definition exports entirely for free with no hidden premium pop-ups. If you are struggling to fix iphone night mode blur, this guarantees your final file is crisp, colorful, and highly shareable.
How did the dark room ruin your photo?
Isolate your image's core mechanical issue. Your automated pipeline changes depending on the source error.
How to align your low-light concerns with the right one-tap pathway
Separate photo weaknesses necessitate independent menu paths. Selecting structured Level 1–5 tap options instead of relying on tedious native gallery sliders is the only way to lock in visual clarity without deep-frying your image.
| Tool Pathway | Primary Flaw Remediated | Automated Fix Strategy |
|---|---|---|
| Enhance Start here | Crushed shadows, heavy ISO grain, and waxy skin from native night modes | Use this first to establish a proper optical foundation. Choose Colors & Lighting to lift data naturally. |
| Looks | Sickly yellow, orange, or green color casts caused by cheap indoor lighting | Use this to update the entire image impression. Select Studio (Level 1–5) to inject clean white balance instantly. |
| Face | Targeted desire to fix dark, "dead" looking eyes that failed to catch the dim room light | Use this last for precise feature tweaks. Select Eye Sparkle to safely inject a realistic catchlight. |
“Professional photo editing should never force you to drag a brightness slider that turns shadows into gray haze. It must mathematically separate the grain from the texture so your native topography looks high-definition, cleanly lit, and 100% effortless.”
Why precise optical rebuilding wins over manual brightness sliders
There is a massive structural difference between recovering image data natively and dragging a manual brightness slider in a native phone gallery. When you use manual tools on a dark file, you are telling the computer to emphasize the digital noise equally with the details. This instantly makes the photo look like a crunchy, washed-out error rather than a quick fix.
Citrus is built from the ground up to be the most accessible enhancer ever created. By relying exclusively on mathematically precise Level 1–5 tap settings instead of tedious manual tools, the engine maps your face securely, optimizing highlight tracking effortlessly. This guarantees that your presentation remains sharp, trusted, and perfectly magnetic without draining your patience.